I have been studying HSR/PRP and wanted to test the network type with a couple of virtual machines.
So I decided to write a small guide about it!
Interfaces
Creating TAP Interfaces
Create two for each machine and set them up.
sudo ip tuntap add tap0 mode tap
sudo ip tuntap add tap1 mode tap
sudo ip tuntap add tap2 mode tap
sudo ip tuntap add tap3 mode tap

sudo ip link set tap0 up
sudo ip link set tap1 up
sudo ip link set tap2 up
sudo ip link set tap3 up
Creating Bridges
Create bridges to connect the TAP interfaces with each other.
sudo ip link add br-hsr0 type bridge
sudo ip link add br-hsr1 type bridge

sudo ip link set tap0 master br-hsr0
sudo ip link set tap2 master br-hsr0
sudo ip link set tap1 master br-hsr1
sudo ip link set tap3 master br-hsr1

sudo ip link set br-hsr0 up
sudo ip link set br-hsr1 up
Check the bridge setup with bridge-utils (brctl).
miika@miika ~> brctl show
bridge name	bridge id		STP enabled	interfaces
br-hsr0		8000.f2bd36c6cf11	no		tap0
							tap2
br-hsr1		8000.96fd5bd190bd	no		tap1
							tap3
Creating Virtual Machines
I decided to use Ubuntu cloud images so I needed to create a seed image for each machine.
If you also opt for cloud images do note that you need to install linux-generic-hwe-24.04 afterwards.
All you really need is a user-data.yaml with the following content.
#cloud-config
password: password
chpasswd:
  expire: False
This allows you to login with the user ubuntu and password as password.
Then create the seed images for each machine. Note that meta-data.yaml is optional. I just copied the same seed image for both machines.
cloud-localds seed-1.img user-data.yaml meta-data.yaml && cp seed-1.img seed-2.img
For more details of cloud images, check the Ubuntu Documentation
I also converted the image to qcow2 and resized it and cloned another one.
qemu-img convert -O qcow2 oracular-amd64.img oracular-amd64-1.qcow2 && qemu-img resize oracular-amd64-1.qcow2 10G && cp oracular-amd64-1.qcow2 oracular-amd64-2.qcow2
Starting the Virtual Machines
Now start the virtual machines with these following commands.
Machine one.
qemu-system-x86_64 -m 2048 -smp 2 -enable-kvm \
  -drive file=oracular-amd64-1.qcow2,format=qcow2 \
  -drive if=virtio,format=raw,file=seed-1.img \
  -nographic \
  -nic user,model=virtio \
  -nic tap,ifname=tap0,script=no,downscript=no,model=virtio \
  -nic tap,ifname=tap1,script=no,downscript=no,model=virtio
Machine two.
qemu-system-x86_64 -m 2048 -smp 2 -enable-kvm \
  -drive if=virtio,file=oracular-amd64-2.qcow2,format=qcow2 \
  -drive if=virtio,format=raw,file=seed-2.img \
  -nographic \
  -nic user,model=virtio \
  -nic tap,ifname=tap2,script=no,downscript=no,model=virtio \
  -nic tap,ifname=tap3,script=no,downscript=no,model=virtio
- added a drive for the seed image
- nic user is added for internet connections
- nic tap0 and tap1 are added for the HSR ring.
- same goes for tap2 and tap3 for the second vm.
Configure Machines
By default cloud images do not come with HSR stuff so we need to install the Hardware Enablement (HWE) kernel.
sudo apt install linux-generic-hwe-24.04
Reboot the VM after the install and do sudo modprobe hsr
HSR kernel module should now be loaded. I did modprobe before I checked if its already loaded (maybe it is). Can't hurt to mention it here :)
Both interfaces must have the same MAC address so set them as follows. On machine 1 I used 52:54:00:12:34:57.
sudo ifconfig ens4 hw ether 52:54:00:12:34:57 && sudo ifconfig ens5 hw ether 52:54:00:12:34:57
On machine 2 I used 52:54:00:12:34:58.
sudo ifconfig ens4 hw ether 52:54:00:12:34:58 && sudo ifconfig ens5 hw ether 52:54:00:12:34:58
Create HSR network on machine 1 add an ip address and set it up.
sudo ip link add name hsr0 type hsr slave1 ens4 slave2 ens5 version 1 proto 0
sudo ifconfig hsr0 192.168.2.10
sudo ip link set hsr0 up
Same treatment for machine 2 but with a different ip address!
sudo ip link add name hsr0 type hsr slave1 ens5 slave2 ens4 version 1 proto 0
sudo ifconfig hsr0 192.168.2.20
sudo ip link set hsr0 up
I decided to use the version 1 for HSR. As mentioned in the man pages option 1 activates the 2012 version of the HSR standard.
version { 0 | 1 } - Selects the protocol version of the interface. Default option is "0", which corresponds to the 2010 version of the HSR standard. Option "1" activates the 2012 version.
For more details, check the ip-link man page.
Conclusions
We have HSR ring with two virtual machines connected to each other with bridges.
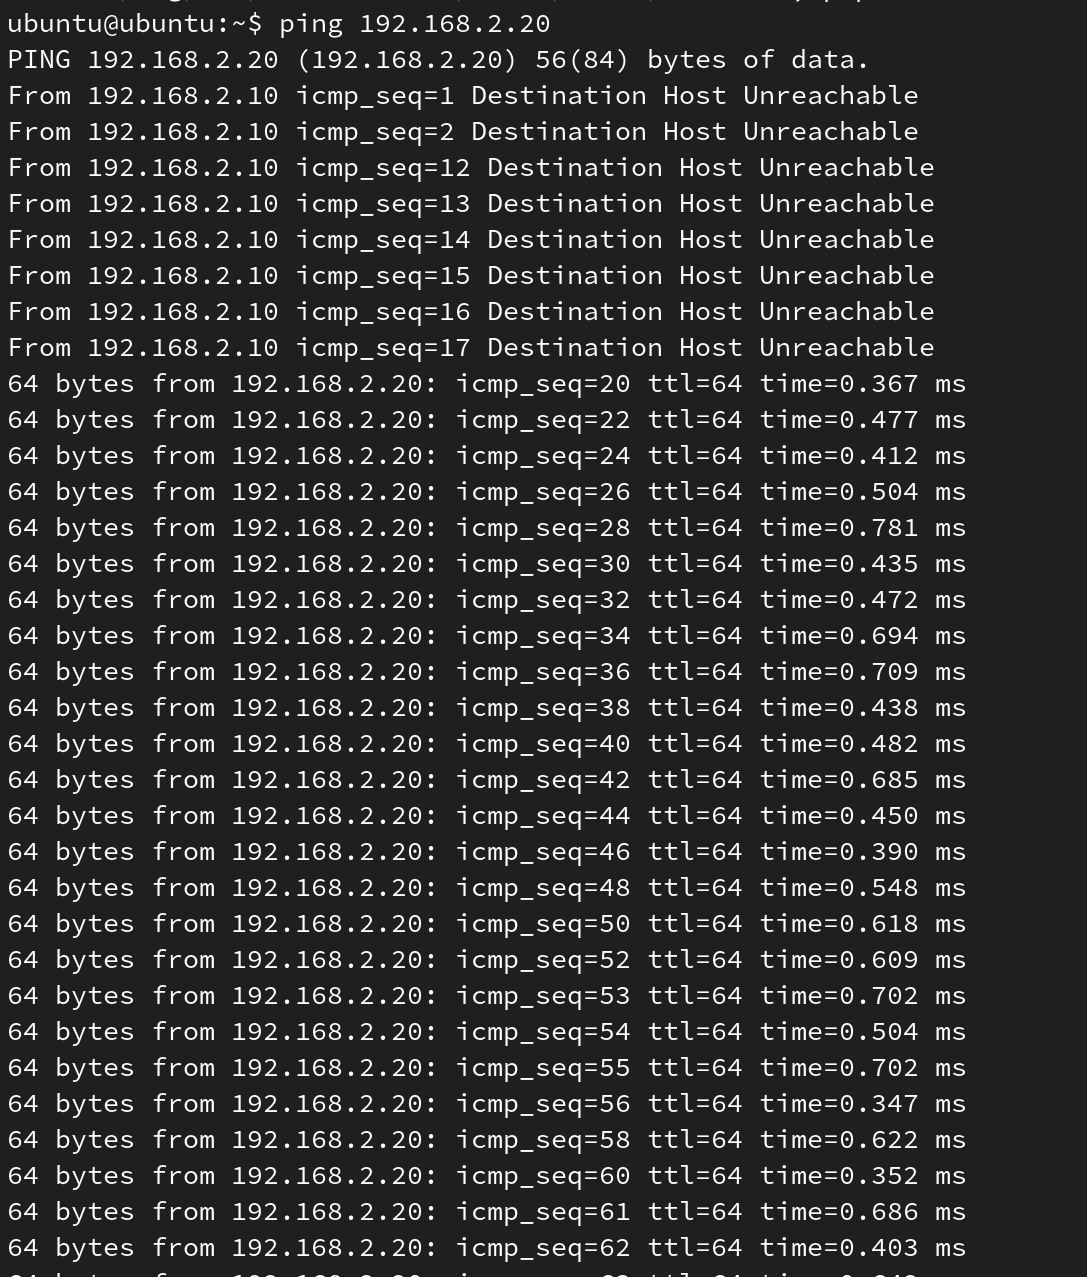
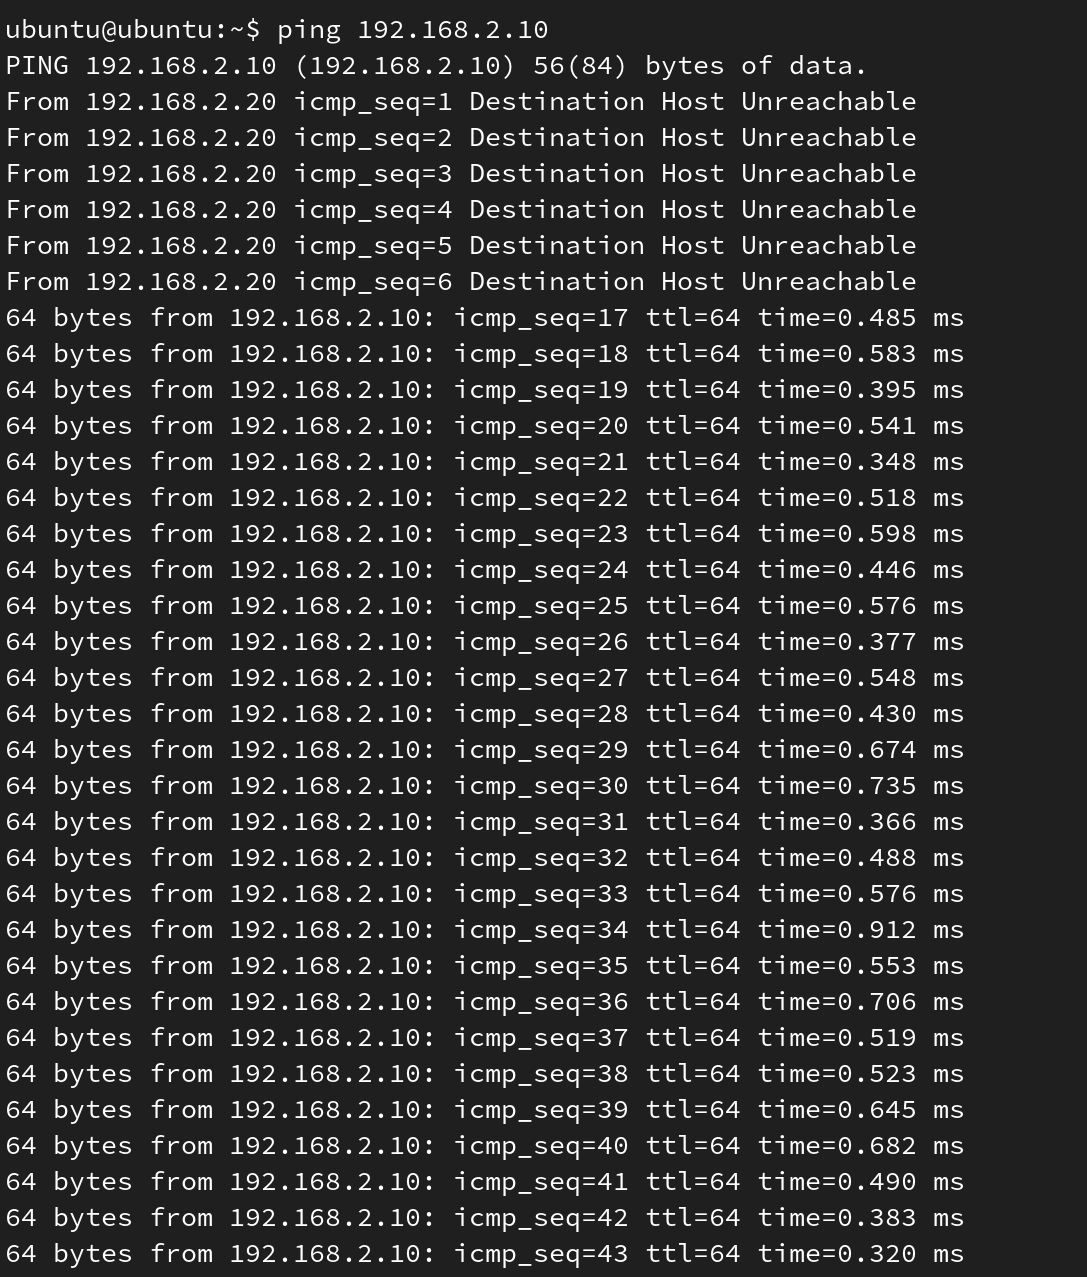
I tried pinging from each side. It took them a while to find each other but after a few pings later they started to respond to each other.
Pinging from machine 1 to machine 2.

Pinging from machine 2 to machine 1

Sources
[1] LWN.net, "Add PRP driver" https://lwn.net/Articles/826386/
[2] Ubuntu Documentation, "Create and use a local cloud-init datasource" https://documentation.ubuntu.com/public-images/en/latest/public-images-how-to/use-local-cloud-init-ds/
[3] Linux Manual Pages, "ip-link(8)" https://www.man7.org/linux/man-pages/man8/ip-link.8.html